How to perform New Receive Payments
In our CRM, when payment for invoices, Payment Plans or ChargeBrite Subscriptions are received, it can be paid through the Receive Payment Page.
- To access the Receive Payments screen, select menu option Customers >> Accounts Receivable >> Receive Payments. Using the Search fields, find the customer that the payment will be applied to.
- You can search by Company Name, Invoice Number, Name, Payment Plan/Installment Number or Customer ID.

- Any of these searches will retrieve the Company and the Customer’s Account, along with the total Amount Due. Click the green arrow to the left of Company Name to view the clients invoice/payment record.

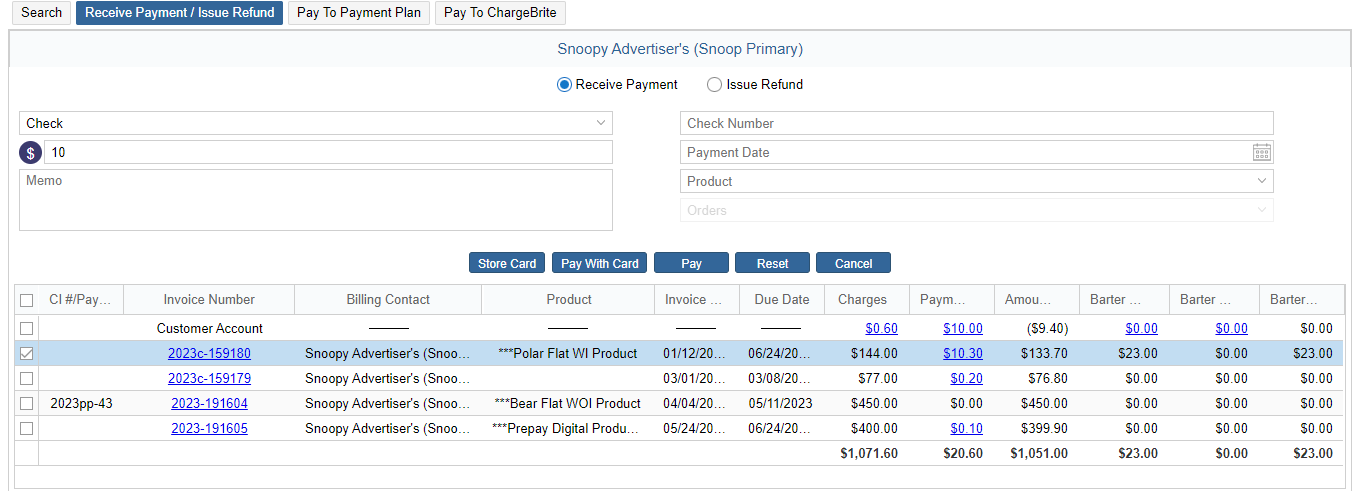
- By Default, the oldest invoice is selected to apply payment. If there are no invoices on the client record, the Customer Account will be selected by default.
 NOTE: You can apply one payment to multiple invoices by selecting the box next to each invoice.

- ‘Billing Contact’ column in the Receive Payments page allows you to see the selected Billing Contact for each order.

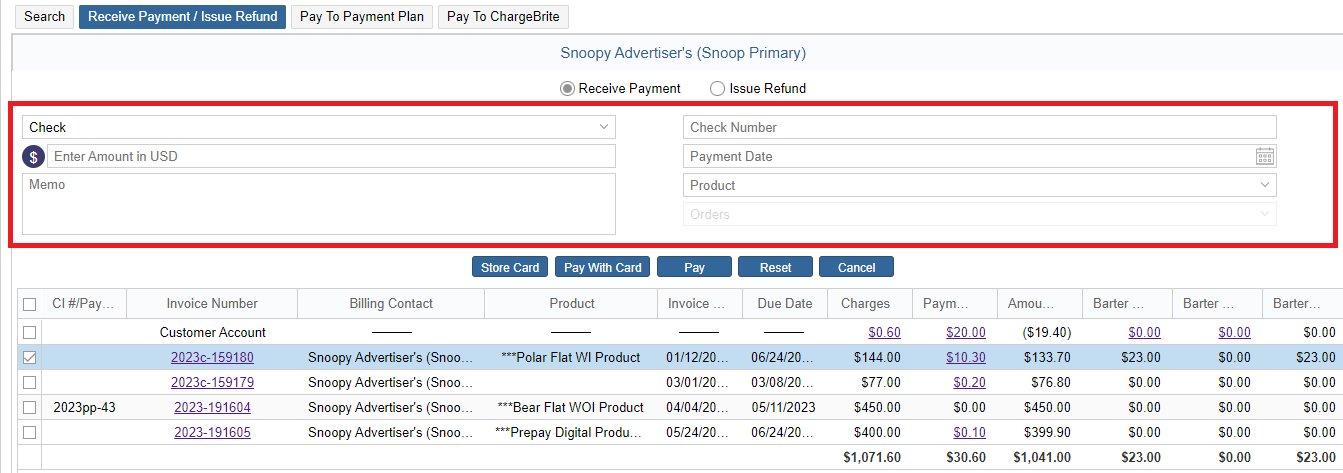
- Use the top portion of the screen to enter in Payment Type, Amount Memo field for notes on payment, and Check Number (if entering a check). For Payment Date,if left blank, Payment Date will auto populate to the date you accepted the payment.
- Once the invoice(s) or customer account is selected, and payment information entered. You will have the following options to complete payment:
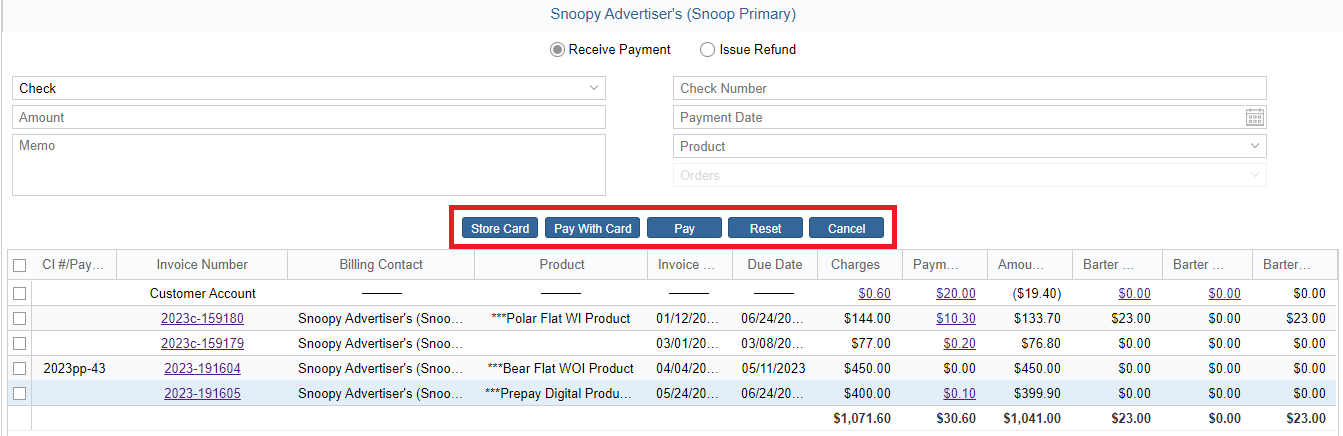
- Click Store Card to add and update the Card Details for client
- Click Pay with Card if you are running a credit card/ACH. This brings up the Payment form dialog box to enter the credit card/ACH information.
- Click Pay if receiving check or cash payments. This will mark a payment to the selected invoice(s) or customer account without making a credit card transaction
- Rest – to clear entered information
- Cancel – to close payment option
NOTE: The option for stored card and Pay with Card will only appear if you have integrated an approved gateway on your site.
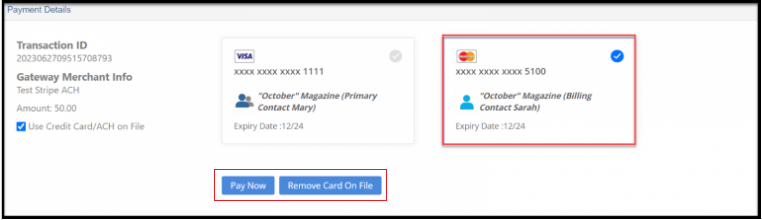
By clicking the ‘Pay With Card’ option, the window appears with any existing card details saved, along with the other fields like Transaction ID, Gateway Merchant and Amount information available on the left side.
NOTE: Contact icons appear on the saved credit cards so you can easily see the contact type that the card belongs to.
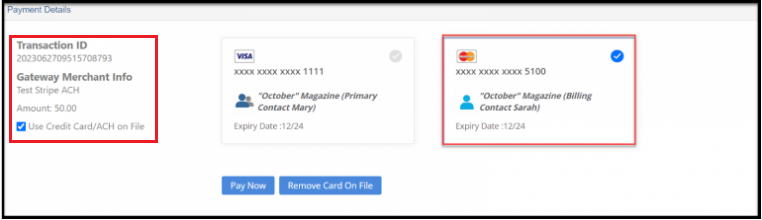
Pay Now – This will proceed with the payment immediately on selecting the selected card details.
Remove Card On File – This option will give you the option to enter new Payment Type details(Credit Card/E-Check(ACH) like Card Number, Expiration Date, CVV or the Routing Account Number and the Billing Address Details.
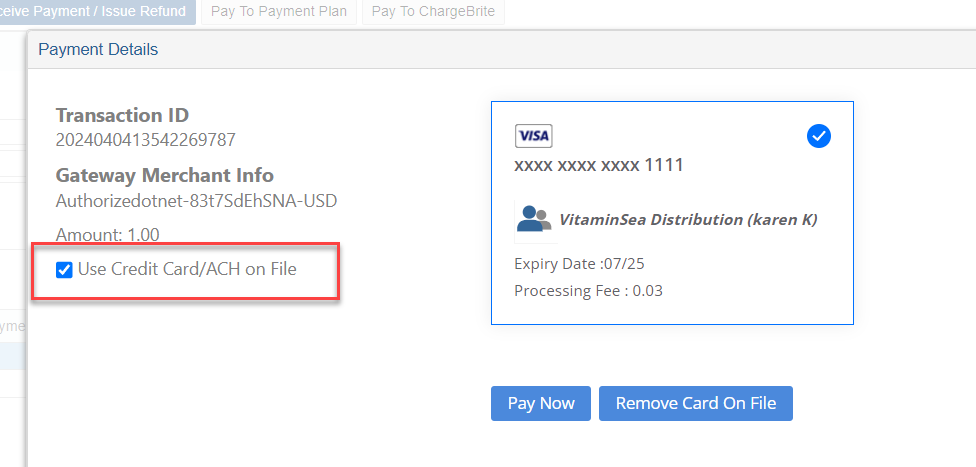
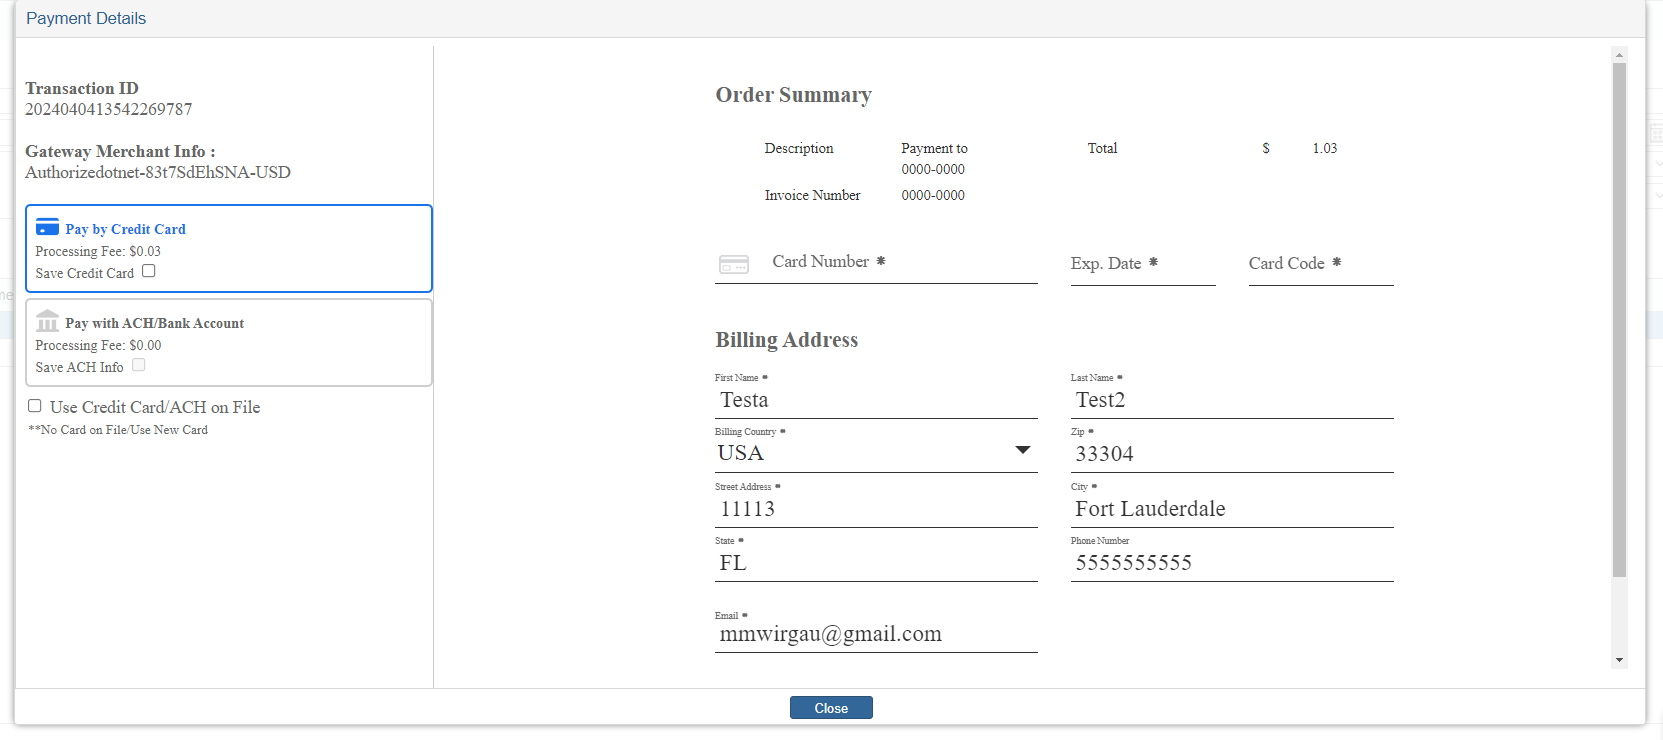
To make a payment not using one of the saved cards on file, deselect the checkbox on the left for saved card. From there, you will be required to enter the cards information as normal:
 Pay With Card Scenarios:
- If selected invoices all have the same selected Billing Contact, then that Billing Contact saved credit card will be selected by default.
If selected invoices have differing Billing Contacts, then an alert will pop up asking to confirm to pay all invoices with the same saved credit card.
In the case that the selected invoices have differing Billing Contacts, and the user chooses to pay with the same saved credit card, then the Primary Contact’s saved credit card will be selected by default. - You can choose between either the card/ACH information saved to the Primary Contact OR the card information saved to the selected Billing Contact for the Order.
NOTE: In order to pay with a card/ACH saved to a sub contact/agency, the sub contact/agency must be selected as the Billing Contact for that Order.
NOTE: If there is no card/ACH information saved to the Billing Contact for an Order, the card saved to the Primary Contact will be used.
Payment Receipt
- Successful Payments will open an acknowledge details screen and the ‘Send Receipt’ button in the Payment Successful page allows you to email the receipt of payment.
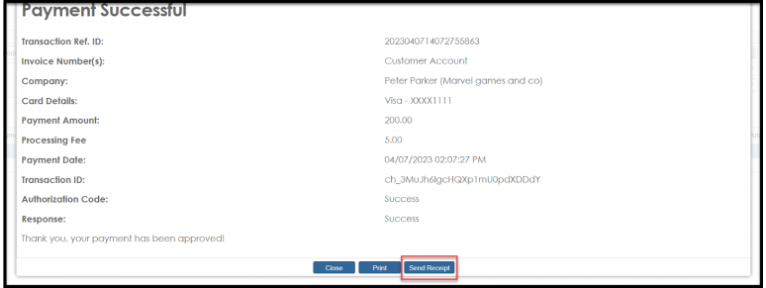 By Default, the ‘To Name’ & ‘Email’ will auto-populate with the Billing Contact information, but you can add additional emails to receive the receipt in the BCC field.
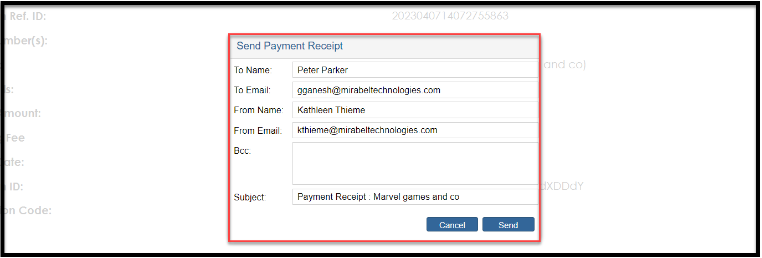
NOTE: If you are processing a payment for multiple invoices, which have differing Billing Contacts, the other Billing Contacts will auto-populate in the BCC field separated by commas.
Customer Account Payments
When making payments from the customer account to open invoices,, ‘Customer Account’ from the “Payment Method” drop-down is selected in the top, along with the appropriate invoice number checked from the list of open invoices. This would apply the funds from prepayments to the customer account to open invoices.
NOTE: This is specifically useful for the “Pay to Payment Plan” tab where every Installment Paid will display the amount in the Customer Account against each invoice.

- Paying through the customer account directly which can be also referred to as ‘No Product’.
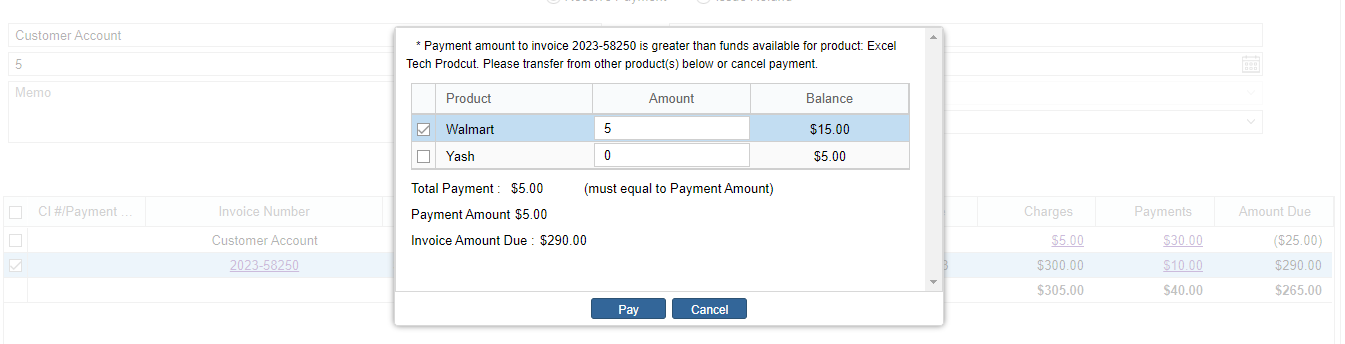
- Choosing the Customer Account and relating it to a specific product(as per the Product paying for, in case of multiple products) for payment.
 If the value for a particular product falls short when paying, a prompt to transfer or switch certain products is displayed for easy payments.
- Choosing based on a specific order for an invoice.

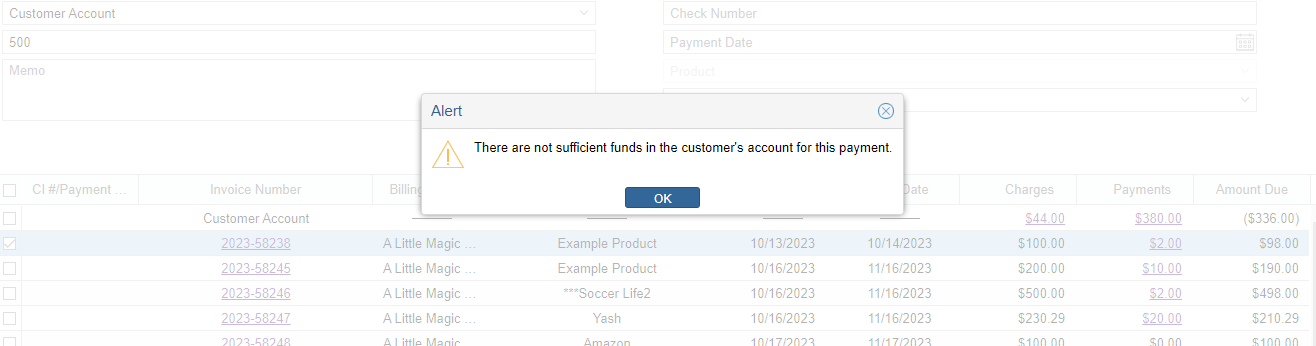
Additionally, if you choose the payment as the customer account and try to pay for a value that is not available, it displays an alert message.
Quick View of Recent Payments
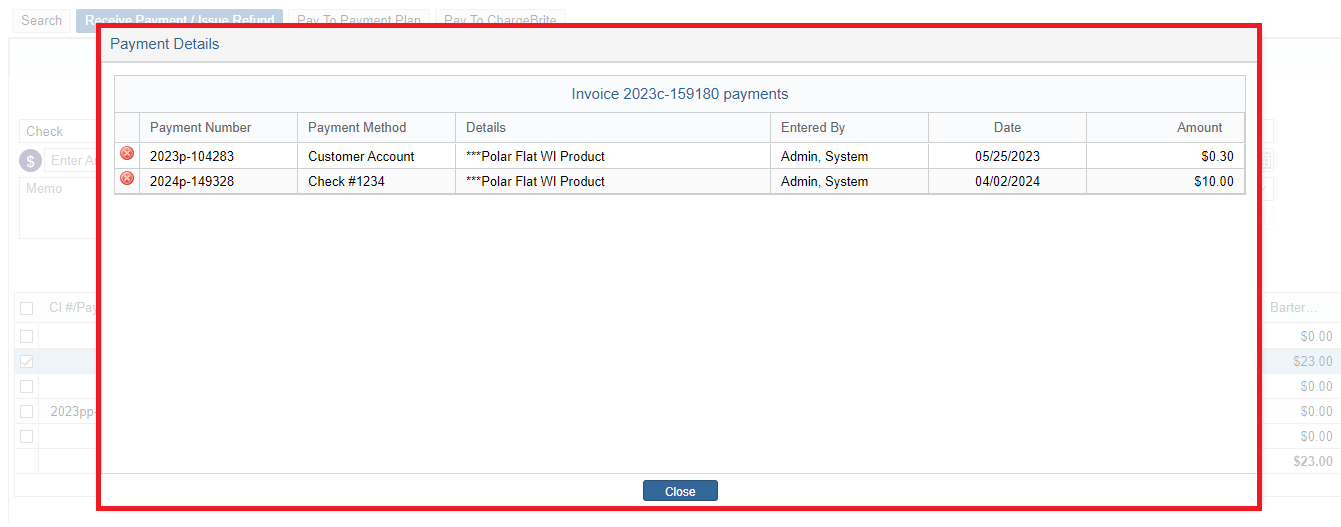
- Additionally, to view the Payments made, click on the value in the Charges/Payments column. This will open a modal window for you to view the transactions done in detail.

We want to hear from you!


