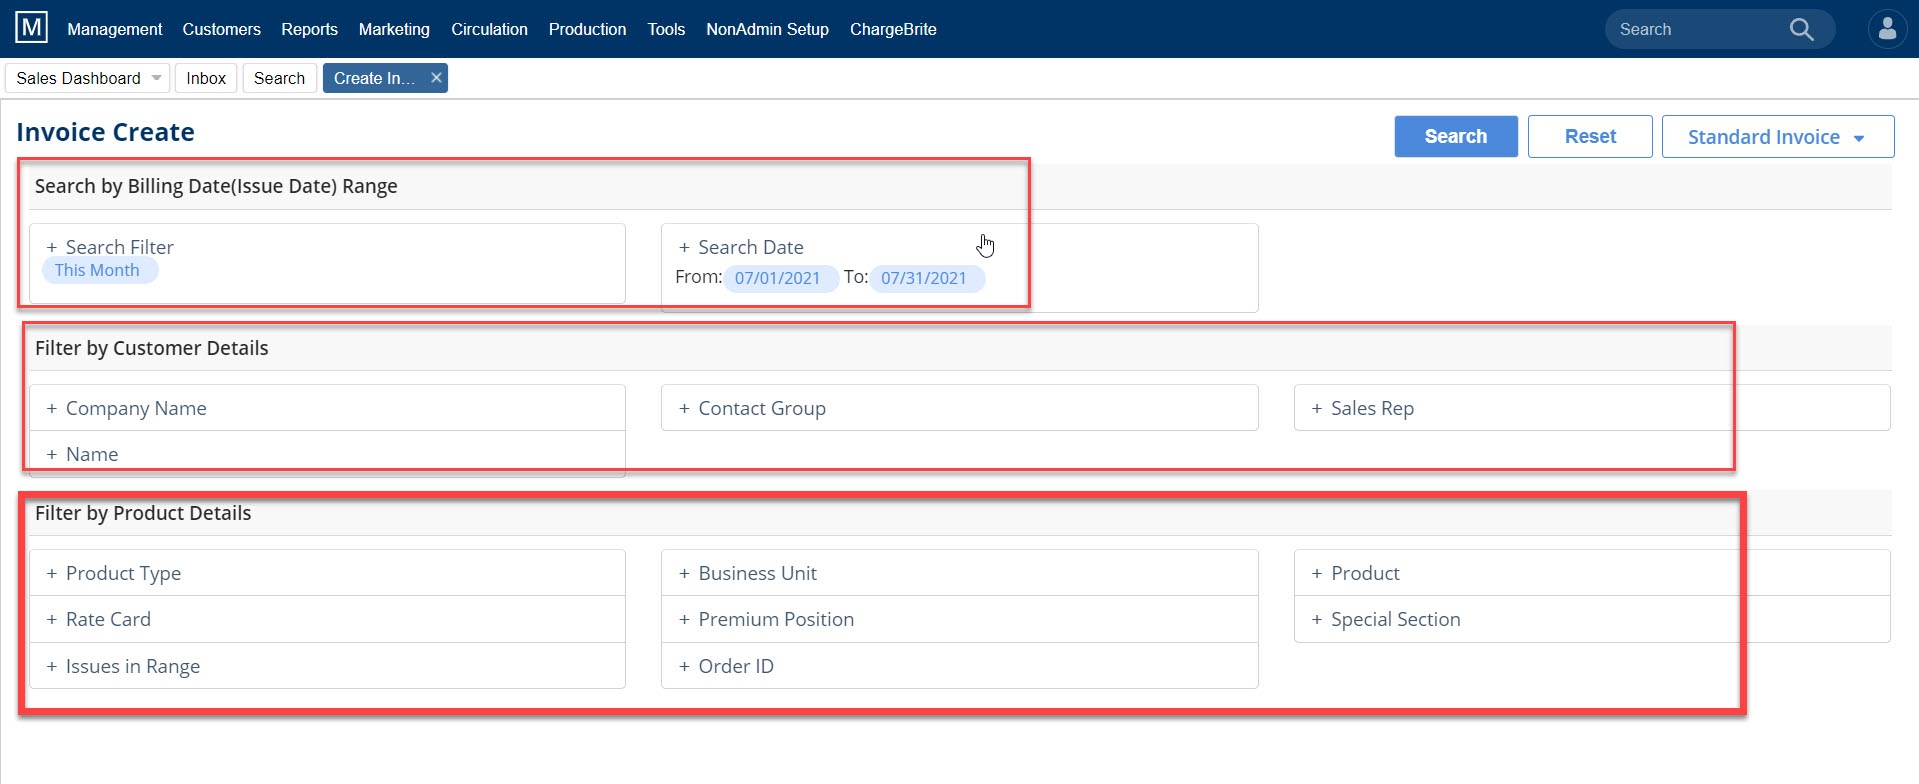
Go to Customers > Accounts Receivable > Create Invoice
- Set the search criteria to find the orders that you will be invoicing.
- Search options for unbilled orders include:
- Date Range
- Company Name, Contact Name, by Rep and Contact Group
- Product Type, Product, Business Unit, Special Sections, Premium Positions, Rate Cards, Issues, or Order IDSearch options for unbilled orders include:
- Search options for unbilled orders include:
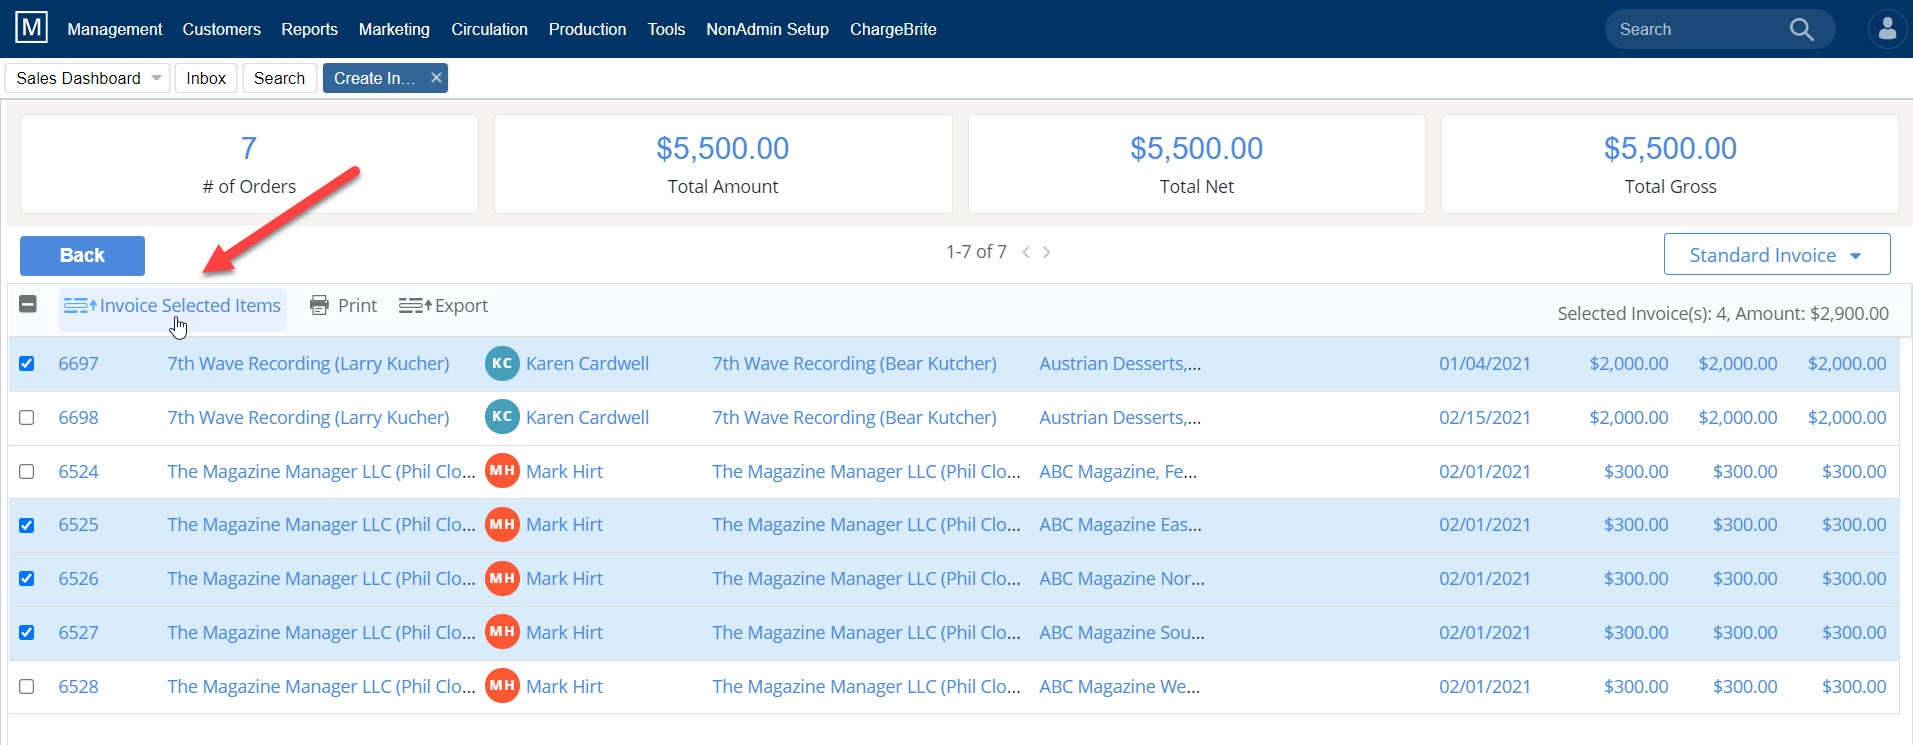
- Select some or all of the line items to invoice.
- Once selected you’ll see the Invoice Selected Items button in the upper-left to continue.
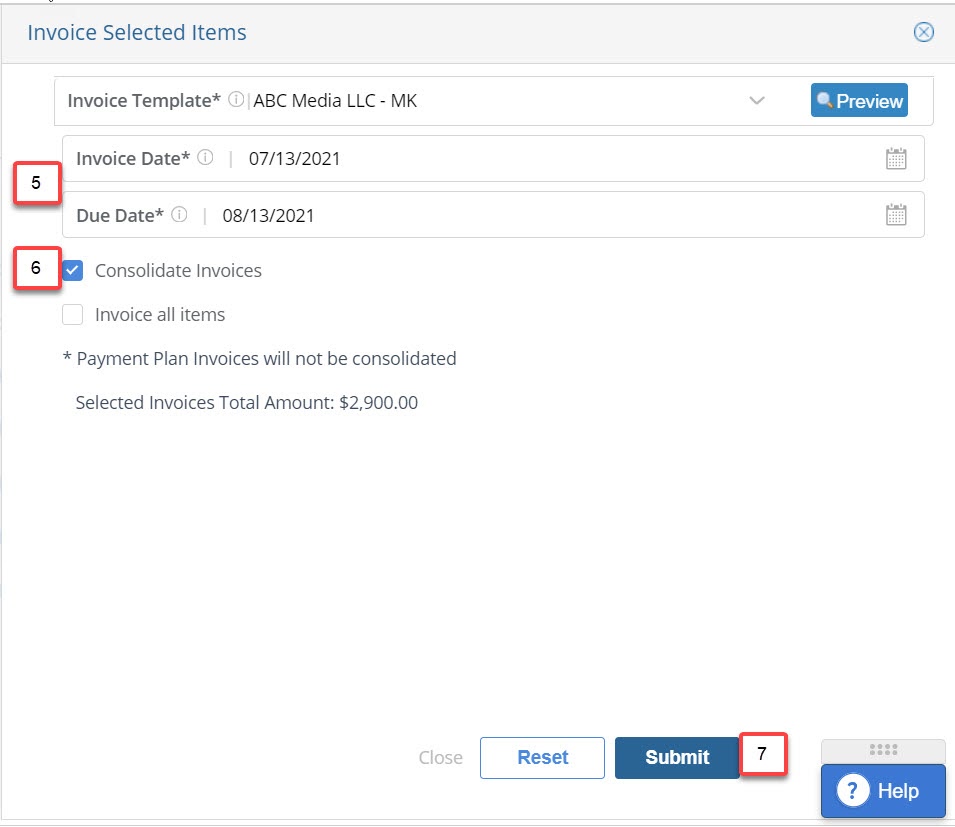
- Select an invoice template
- Set the Invoice Date & Due Date.
-
- Note: Aging calculates based on the due date, not the invoice date.
- Check the Consolidated Invoices check box if you want to group multiple line items for a common advertiser/billing contact onto a single invoice.
-
- Check the box “Invoice All Items” to invoice ALL items on all results pages.
- Note: This will ignore any specifically selected items and invoice everything in the search results, regardless of the number of result pages.
- Check the box “Invoice All Items” to invoice ALL items on all results pages.
- Press the Submit button to create the invoices.
 Quick Tips:
- The Invoice numbering scheme is as follows:
-
- Single item invoice: YEAR-ORDER ID (2020-4535)
- Multiple line-item invoice (AKA Consolidated Invoice): YEARci-Incremented No. (2020ci-123)
- Miscellaneous Client Charge: 2020c-45
- An Invoice Job is created whenever an invoice is emails, printed or printed to a PDF. You should review the invoice job log EVERY TIME you email invoices, as this will list all customers who didn’t have an email sent due to a missing or invalid email address format.
All invoice jobs are stored under Customers > Accounts Receivable > AR Job Search, if you ever need to reference the entire invoice job.
We want to hear from you!
MORE ARTICLES ON
Invoices


