If there are any existing Folios in this issue, they will be displayed. If there are none created – the system allows you to create new folios.
If there are no existing folios, you are prompted to create new folios. Click Yes to proceed.
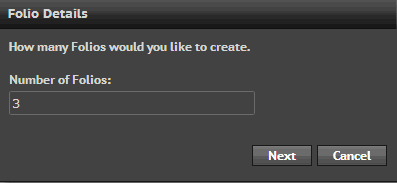
Enter the number of folios you want to create. Click Next.

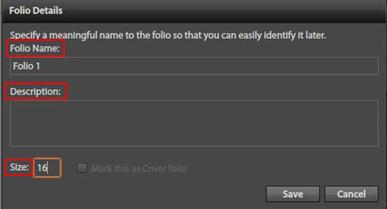
- Enter the Folio Size; the number of pages each folio should have.
- If you want to create folio, select Include Cover Folio check box.
- Click Create Folio.
New Folio: Click New Folio on the Top Menu of Plan Page.
- Create a name and assign the number of pages for the folio. Click Save
- Cover Folio – must have only 4 pages to be a COVER – NOT included in page count
- Once you save – the folio is available for you to manage
- Click on the Folio Name to open/view pages

- To edit folio details, click Edit button of respective folio.
- You can edit the folio name, description and number of pages
- Click Save to retain the modifications
- To delete a folio, click Delete . A confirmation message is displayed, upon deleting a folio
You can now map both insertions and assets to the desired pages by using drag & drop functionality.
We want to hear from you!
MORE ARTICLES ON
Digital Studio
videos relating to
Digital Studio


