A consolidated invoice is a document representing a group of invoice line items that is delivered to clients as an alternative to sending multiple individual invoices to a single client. The consolidated invoice number format is (the year”ci”-number, i.e. 2020ci-548). The invoices are grouped by billing contact; consequently, if a single client has orders that are billed to different contacts, the consolidated invoices will be created accordingly. Remember that though you may search for standard invoices and clients based on the consolidated invoice number, payments are still applied to the associated invoice line item. Each invoice line item has an internal invoice number that represents the “year and order ID #” (i.e. 2020-12387). If you have enabled the Use Consolidated Invoice, the “Consolidate Invoices per Billing Contact” checkbox will be available. This checkbox can be defaulted to checked or unchecked per your preference.
Summary: Consolidated invoices are only created when there are two or more order line items for a single customer/billing contact grouping.
Create a New Consolidated Invoice
Go to Customers > Accounts Receivable > Create Invoice
(Alternate menu path: Accounts Receivable > Create Invoice)
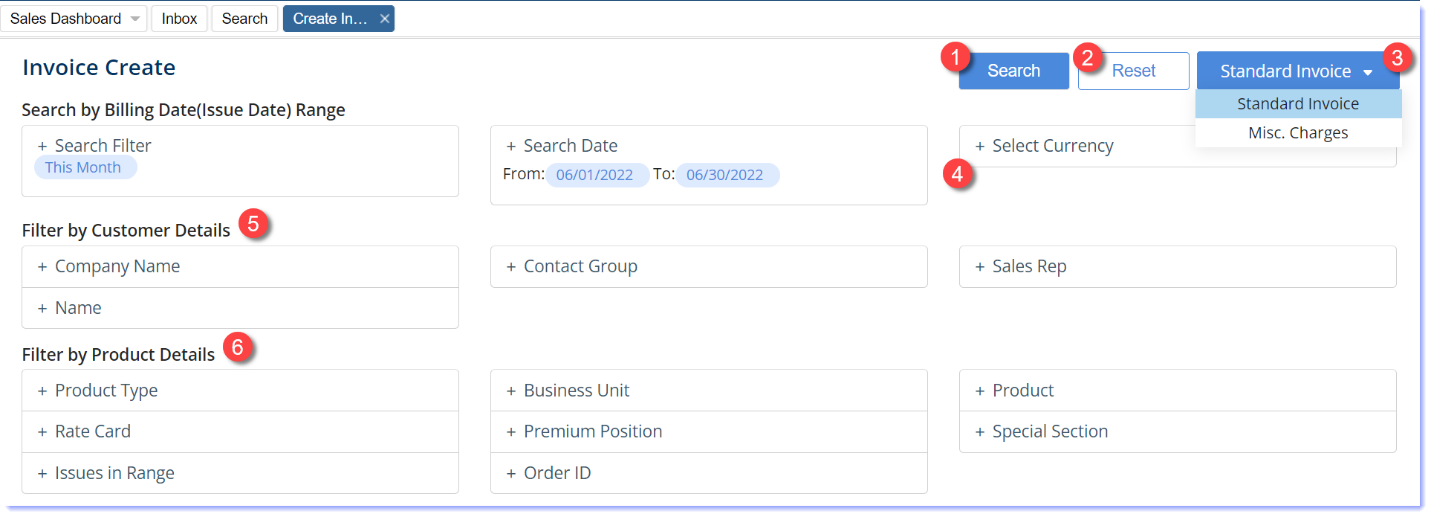
While most search criteria are self-explanatory on this screen, a few items stand out:
-
- Press the Search button to find order items that have not yet been invoiced.
- Press the Reset button to clear all search criteria for a new search.
- This will default to Standard Invoice but can be changed to create a Charges invoice that does not tie to an order.
- If your site is active with multi-currency, filter here for orders of a particular currency.
- Note – You must invoice each currency as a separate invoice creation process. Only one currency type can be on each invoice. Please contact your software consultant to active multi-currency on your site.
- Filter by Customer Details – Filter for orders to be invoiced by these Customer details: Company Name, Contact Group, Sales Rep, Name
- Filter by Product Details – Filter for orders to be invoiced by these Product details: Product Type (Print/Digital/Subscription), Business Unit, Product, Rate Card, Premium Position, Special Section, Issues in Range** & Order ID
- **Issues in Rage – Will select all of the issues that are in a publication schedule found in the date range defined by the Search Date range entered in the upper search criteria area.
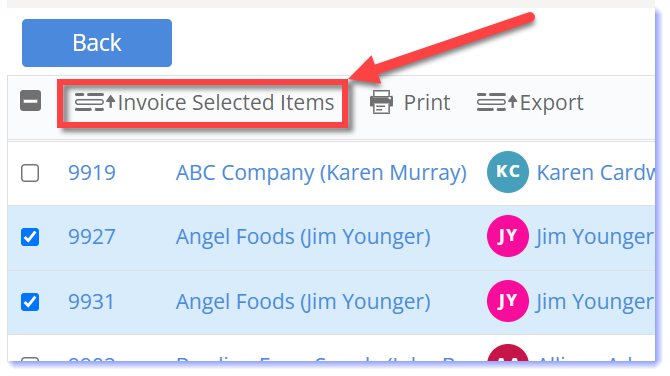
Once the orders are found, select the orders to be consolidated by checking the boxes on each row to consolidate & click Invoice Selected Items. Next, select the invoice template.
-
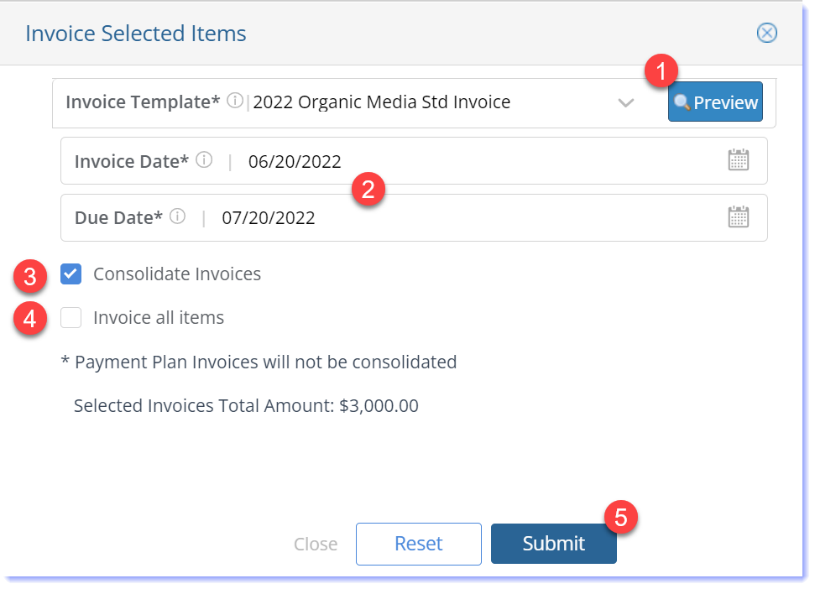
- Click the Preview button to verify the selected invoice template.
- Set the Invoice Date & Due Date.
- Note – The invoice date defaults to today’s date & the due date defaults 30 days later. Aging begins as of the due date, not the invoice date.
- Check the Consolidate Invoices
- Check the Invoice All Items box to invoice ALL LINE-ITEMS on ALL PAGES OF RESULTS.
- . Note – Checking this will ignore any items you manually check and create for items in this search result.
- Press the Submit button to submit this invoice creation job request.
Once the invoices are created, search for them and Preview, Print, Print to Pdf or Email the invoices. The invoice numbers have ‘ci’ right after the invoice year, indicating it’s a consolidated invoice as seen here.

Note: To avoid confusion for the client, line items on a consolidated invoice cannot be sent individually; only the consolidated invoice can be delivered, which includes all line items.
To receive payment made to a consolidated invoice, Account Receivables> Receive Payment & search for the customer. Unpaid invoices will be listed at the bottom once you select the customer. Select the individual rows of the consolidated to which you’d like to apply the payment.
Note: Remember that payments are applied to the line item on the consolidated invoice.
You can delete any line-item from a consolidated invoice. Simply click the delete button on the right of the row being removed from the consolidated invoice.

To void a Consolidated Invoice, delete all payments that may be applied to line-items of the consolidated invoice.
-
- Select the row of the consolidated invoice number.
- Press the Unlock button to Unlock the invoice.
Select the row of the consolidated invoice number again.
-
- Press the Void button to Unlock the invoice.
We want to hear from you!


