Payment Plan Plus: How to Create a Payment Plan
Updated February 2021
The Payment Plan Plus is for our clients that run multiple line items and then need to create a specific number of installments over time. The Payment Plan Plus gives you the ability to create installments, send bills, receive payments and then apply the payments received to the actual line items as they are invoiced during the normal invoice cycle. Essentially an added accounting feature that allows you to manage complex installment billing needs.
How to use the Payment Plan Plus – Steps for creating a new payment plan and editing an existing plan.
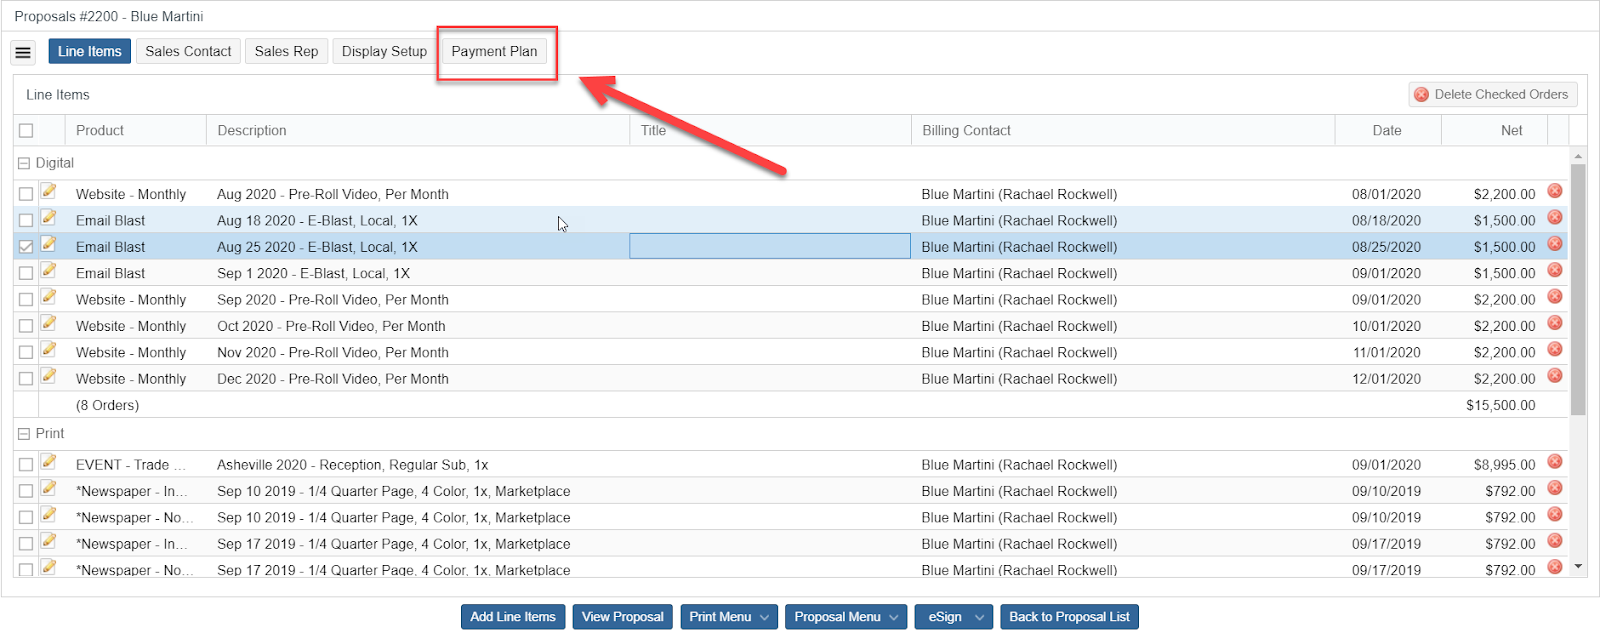
Create a proposal – To utilize the Payment Plan Plus feature you must start with a proposal.
- Add all the line items you need to then click the Payment Plan tab. In this example, there are 21 line items including print, digital and events .
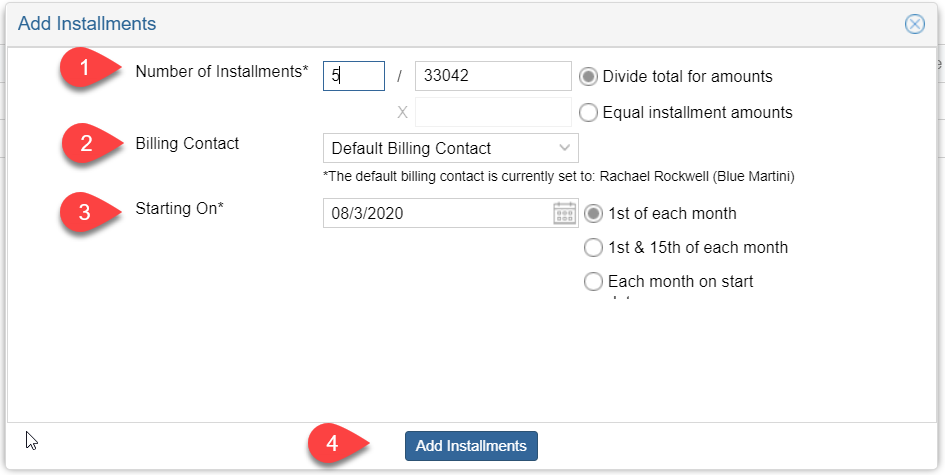
- Select Installment Template

- Press “Add Installments”
- Add the number of installments (default is divide total for equal amounts – select equal installments if you want to set the installment amounts) (Step 1 in screen shot)
- Confirm billing contact.
- Confirm the billing start date and frequency.
- Press the Add Installments button.
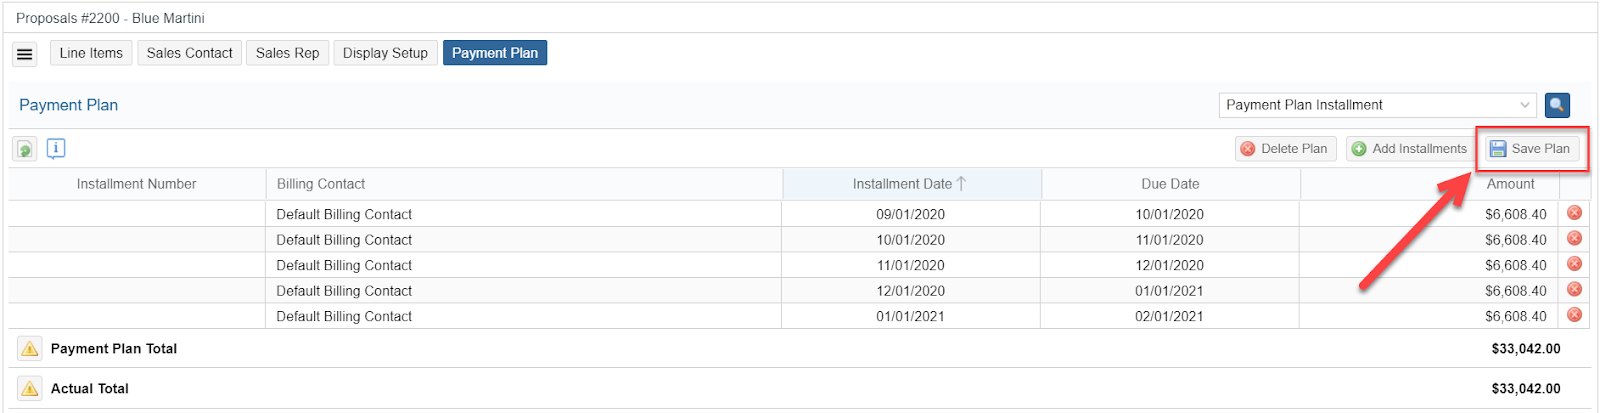
- Click Save Plan
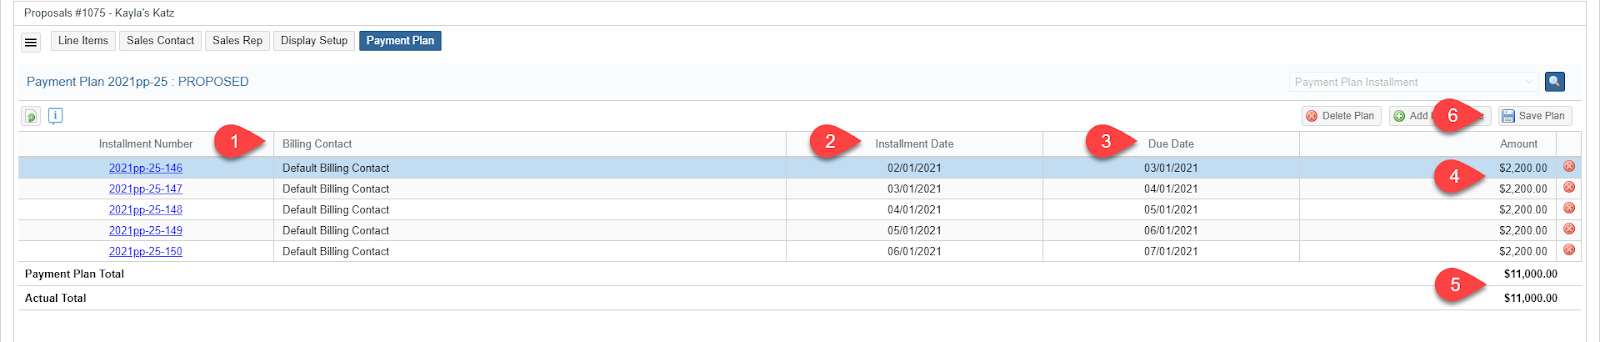
- Edits/Adjustments – Here you can change each installment date, due date and even installment amount.
- Verify/change the billing contact for each installment.
- Verify/change the installment date for each installment.
- NOTE – Changing the installment date does NOT automatically update the due date.
- Verify/change the due date for each installment.
- Verify/change the installment amount for each installment.
- Verify the Payment Plan Total & Actual Total amounts match.
- Press Save Plan.
- Convert the proposal to a contract.
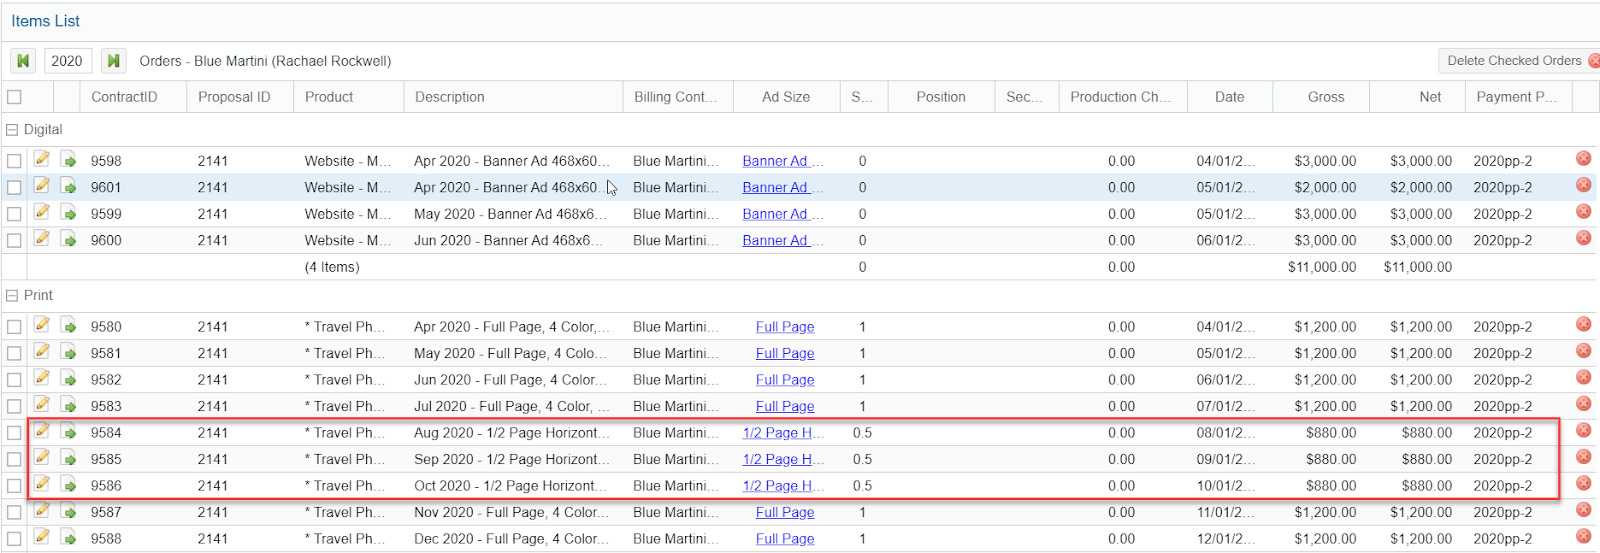
Edit Installment plan – Individual line items can be changed, so if a client who has been running for months decides to change the ad size (also changing the price) it can be updated as in below example.
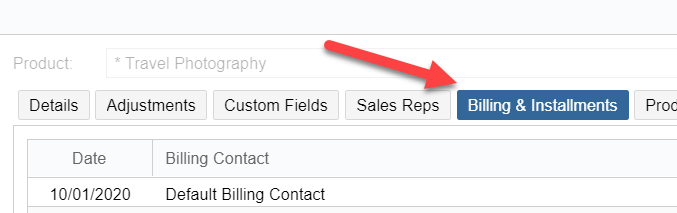
- Open the contract page (make sure Payment Plan column is enabled). Here the client has decided to change issue print size from a full page to a ½ page
- Edit the Ad Size on the contract and save. Reopen the same line item and select Billing & Installments tab
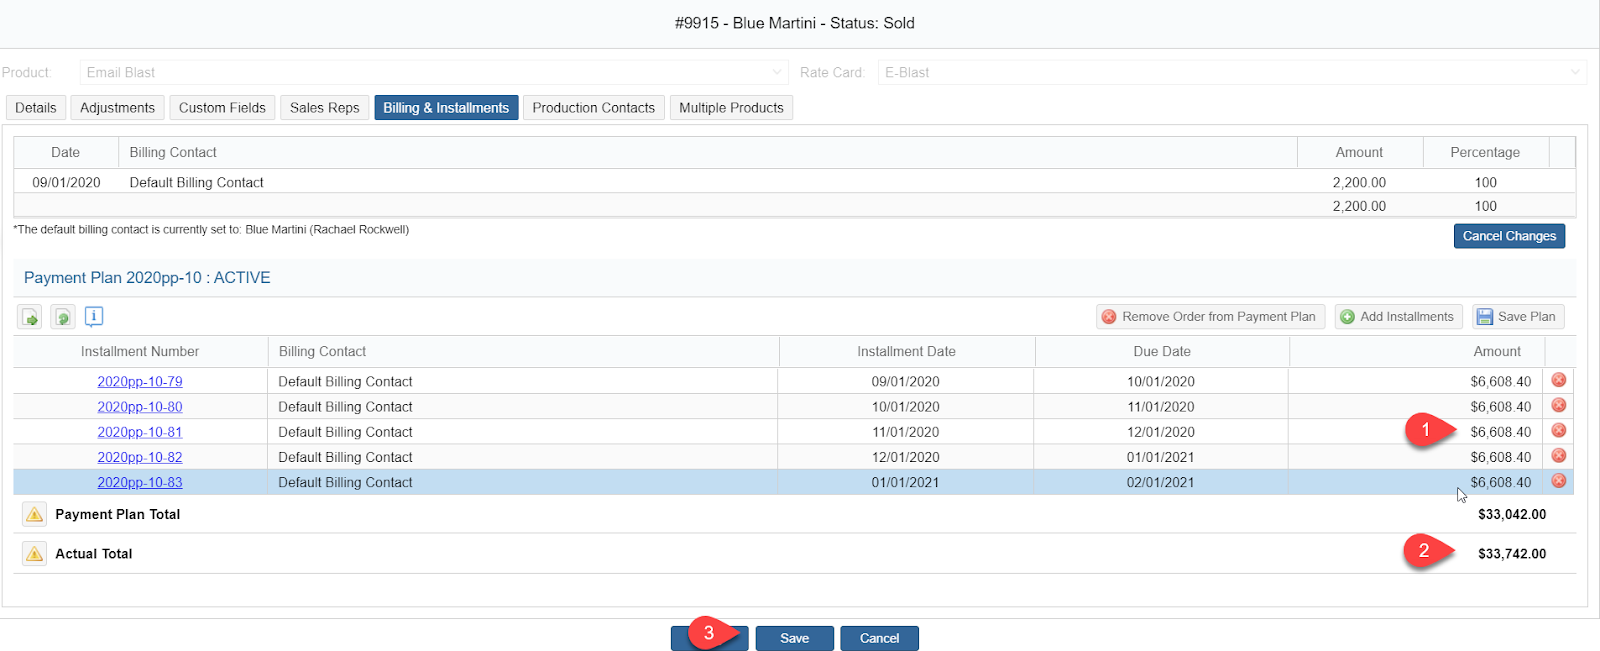
- 1. Update the installment amounts > 2. so it matches with the Actual Totals > 3. Save
We want to hear from you!


